Making test API calls
Once you've registered an app, you can begin making API calls. If you want to try out the Zywave API right away, you can use an API client like Insomnia. All API clients will require the same basic steps.
- Import the OpenAPI document spec into the API client
- Configure request authentication
- Make the request and examine the result
The following example shows how to use Insomnia and the authorization code OAuth flow to call the profiles API.
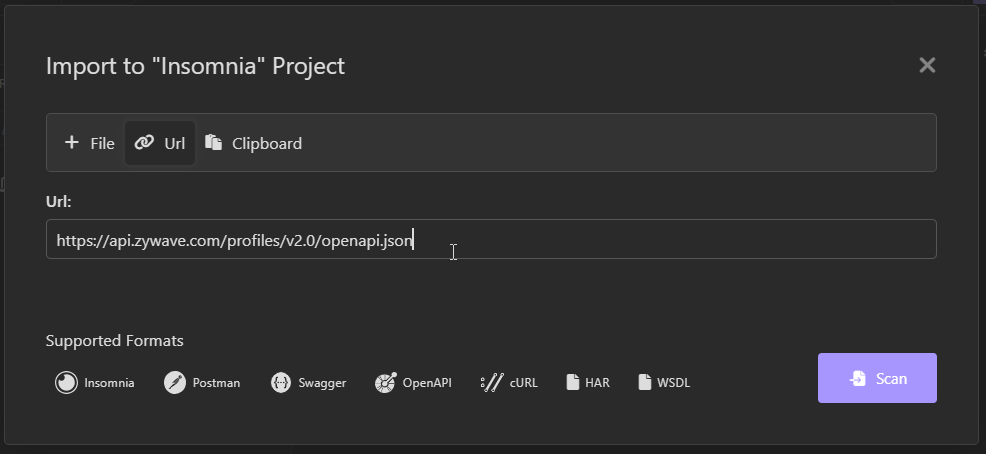
Importing The OpenAPI Document Into A Workspace
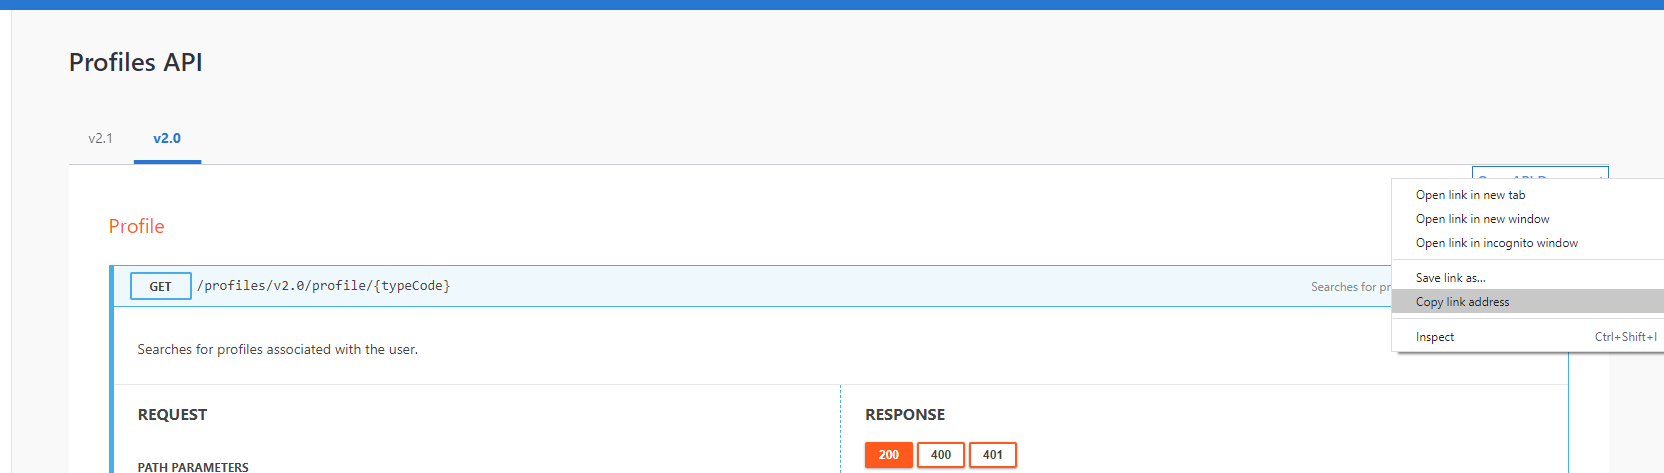
Although Insomnia supports several ways of importing an API spec, the simplest way is to just import the OpenAPI document using the URL under the OpenAPI Document link.

Configuring Authorization Code Flow Authentication
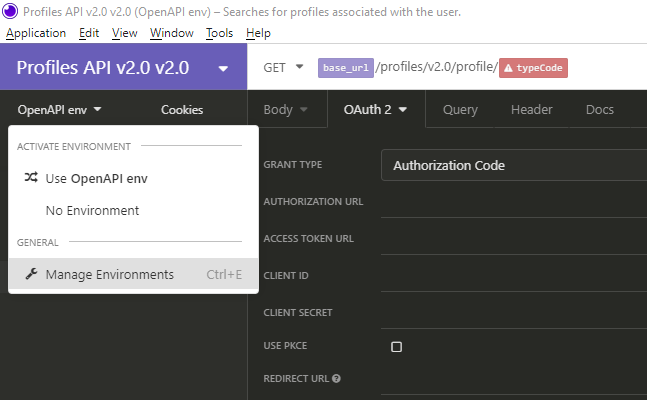
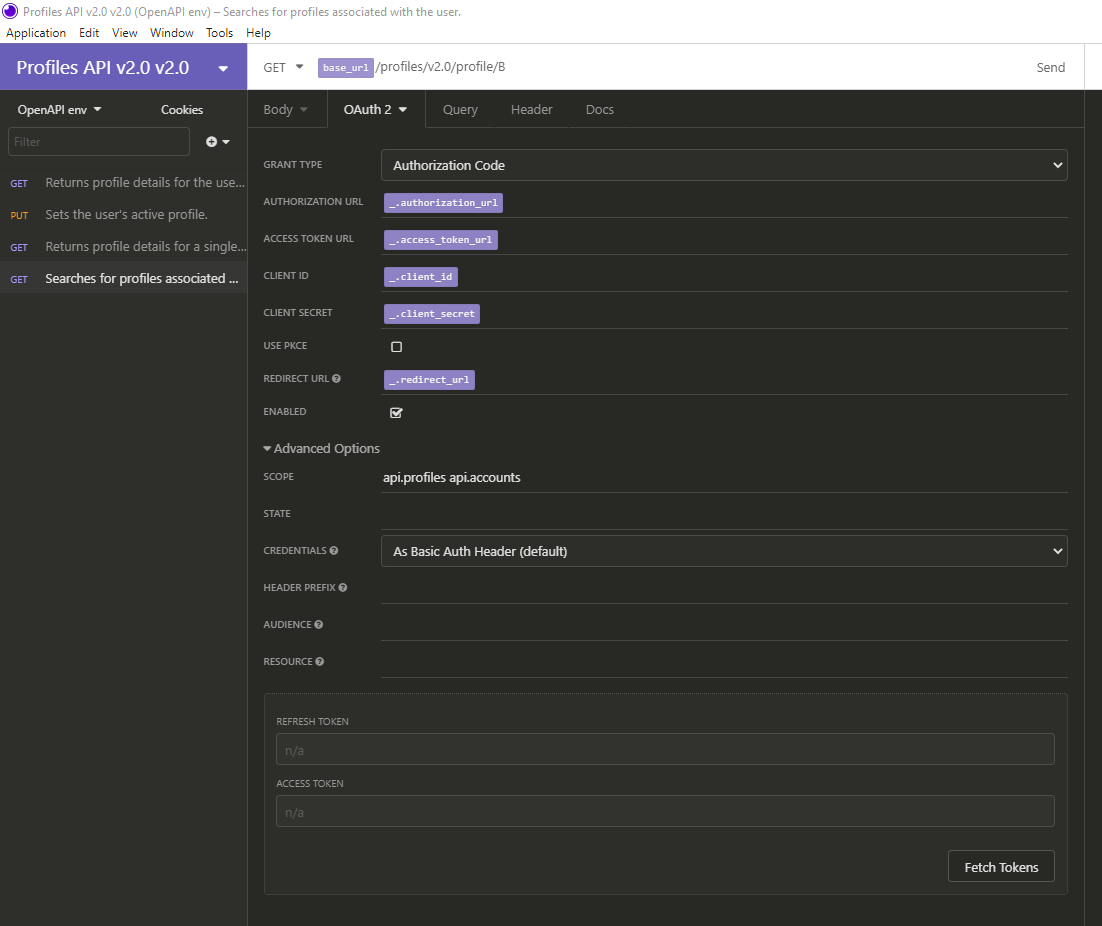
When you select the basic GET method from the left pane and click the Auth tab and select Authorization Code under GRANT TYPE, you'll see something like this.
![]()
The typeCode node is highlighted in red because it's a required argument that you haven't specified, but we'll fill that in after you've configured the authentication parameters. To make that easier to do, Zywave created an Insomnia environment variable set. Click OpenAPI env beneath the API name and click Manage Environments.
Paste the following environment JSON into the editor:
{
"application_id": "your_application_id",
"application_secret": "your_application_secret",
"application_uri": "your_application_uri",
"scheme": "https",
"base_path": "",
"host": "api.zywave.com",
"idp_uri": "https://auth.zywave.com",
"authorization_url": "/connect/authorize",
"access_token_url": "/connect/token",
"client_id": "",
"client_secret": "",
"redirect_url": "/signin-oidc"
}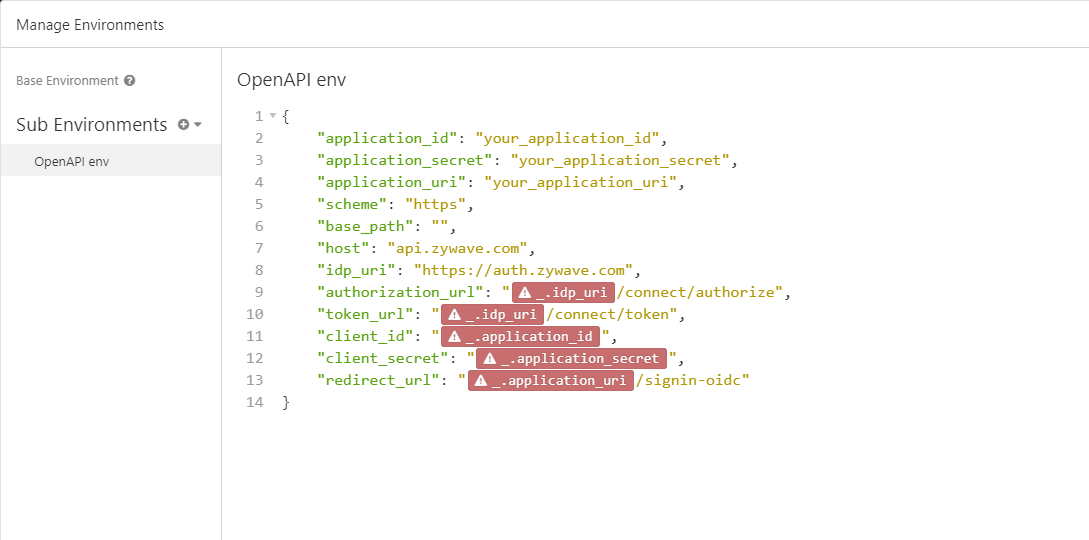
The environment should look like this by the time you're done. 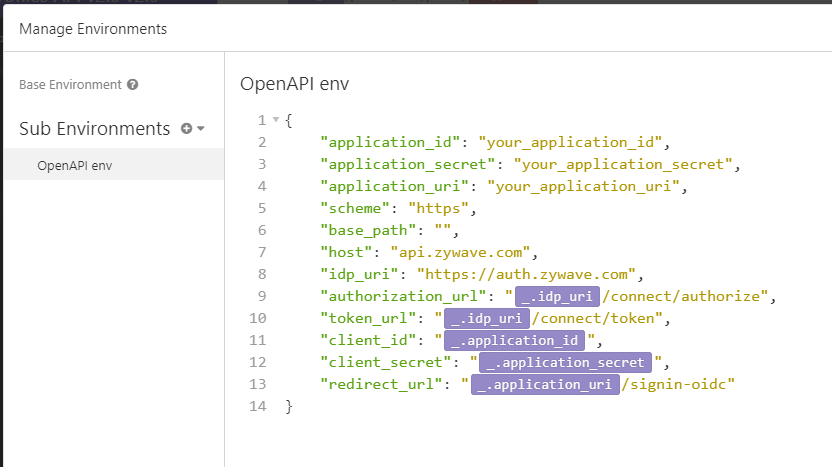
Finally, set application_id, application_secret, and application_uri to their corresponding values from https://admin.zywave.com and click Done.
Using The Environment Variables To Configure Authentication
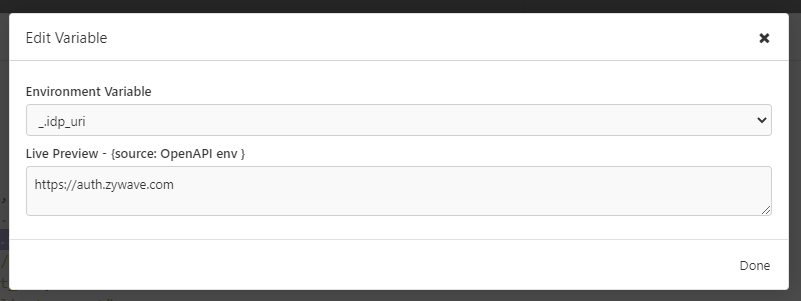
The environment variables have been named to closely match the fields in Insomnia. You can reference the environment variables that you need for authentication with the syntax ``. Insomnia also provides intellisense for environment variables, in case you're ever unsure which ones we need. Finally, you'll need to click Advanced Options and list any scopes that you'll need for the APIs you're going to use. In this example, we're choosing api.profiles and api.accounts. Once that's done, click Fetch Tokens.
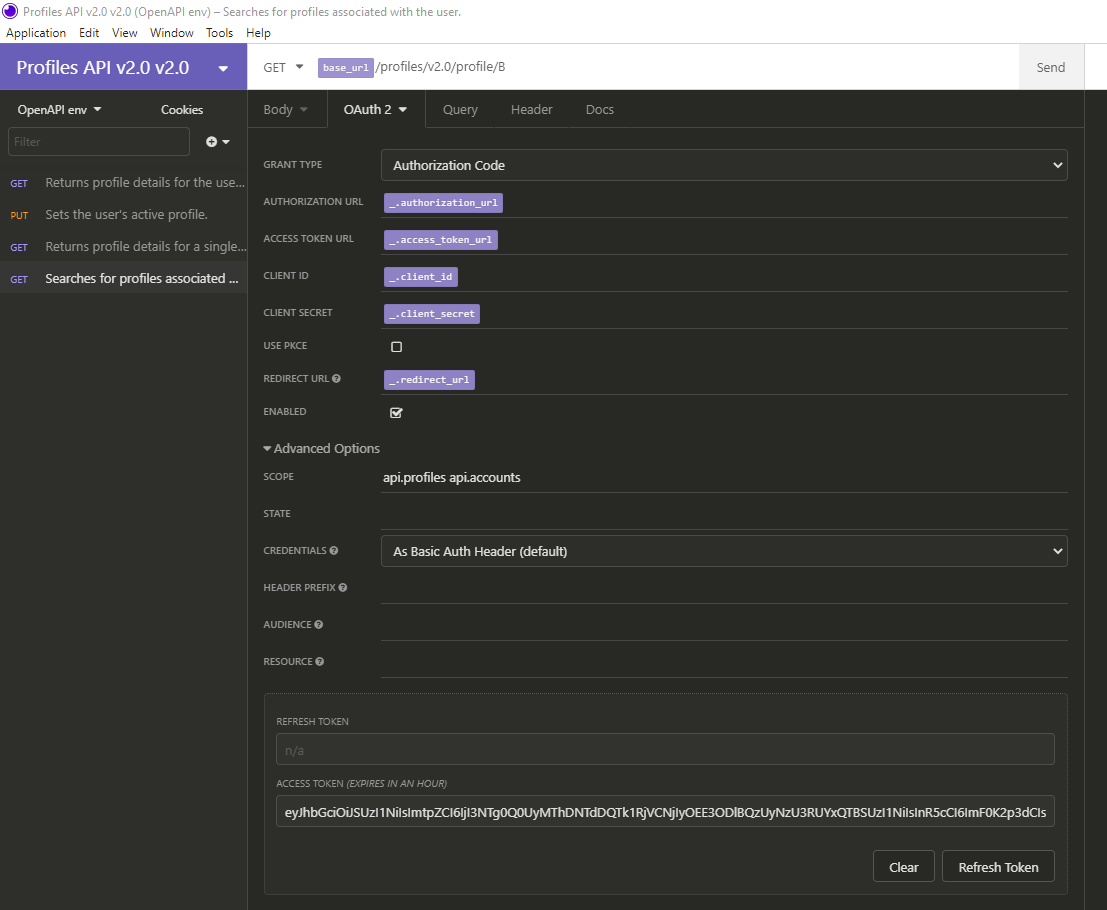
If your authentication parameters are configured correctly, a pop-up will appear containing your organization's sign-in page. Authenticate as you would normally, and then grant the application access to your Zywave data. The pop-up will close automatically when you're done and you'll see a token appear in the ACCESS TOKEN field. If your app has access to the offline_access scope and you had included it in our list of scopes, you'd also see a token appear in the REFRESH TOKEN field. Since we didn't, that field is blank.
Making Calls And Viewing Results
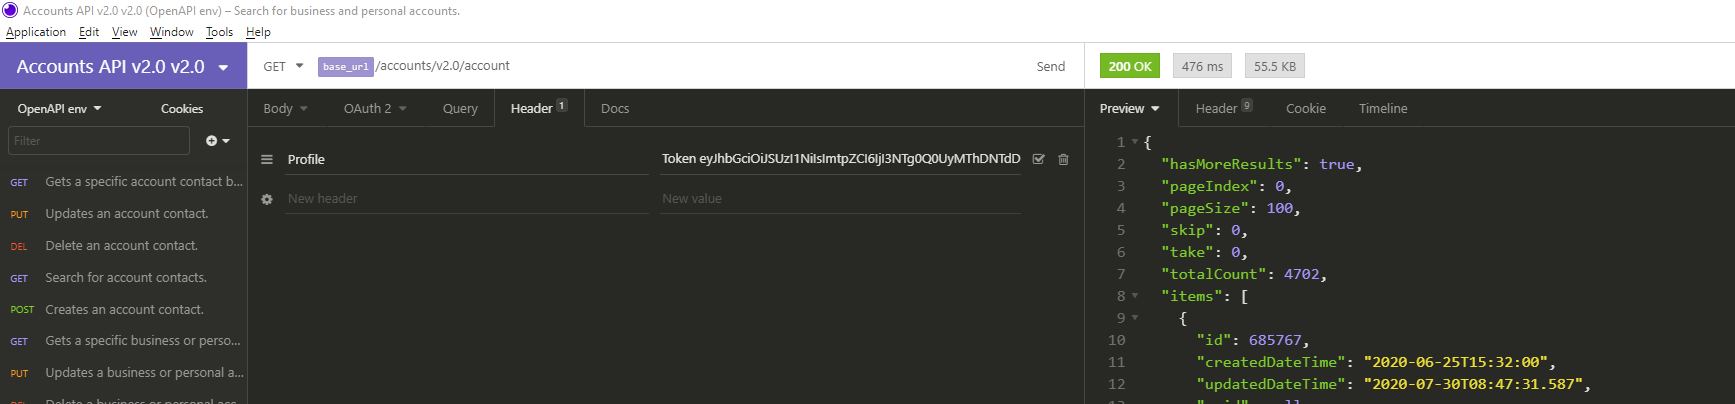
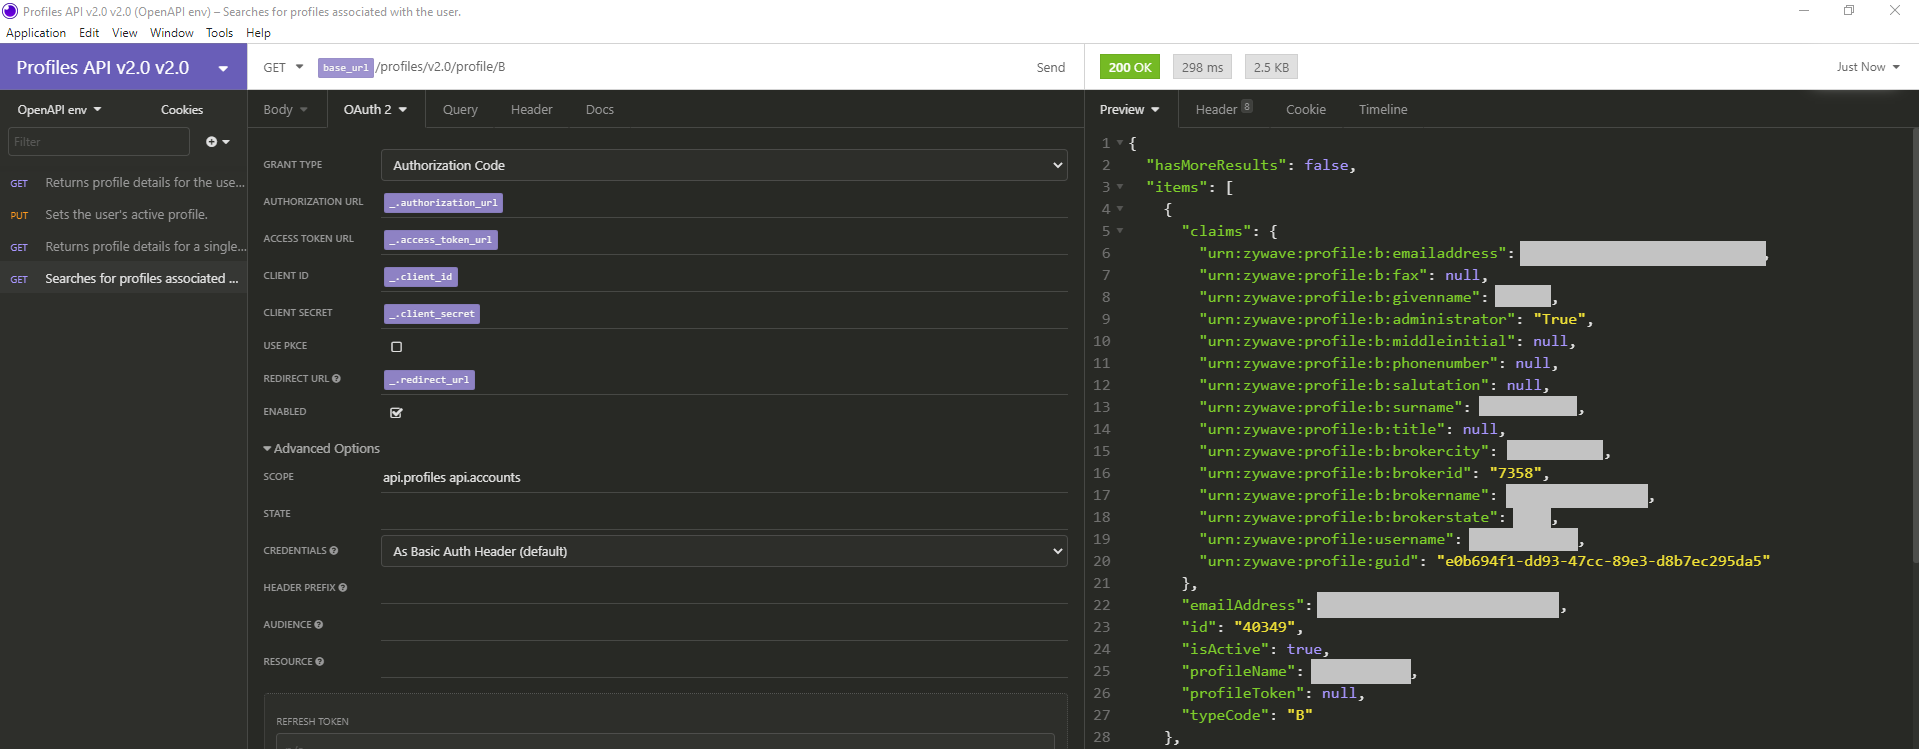
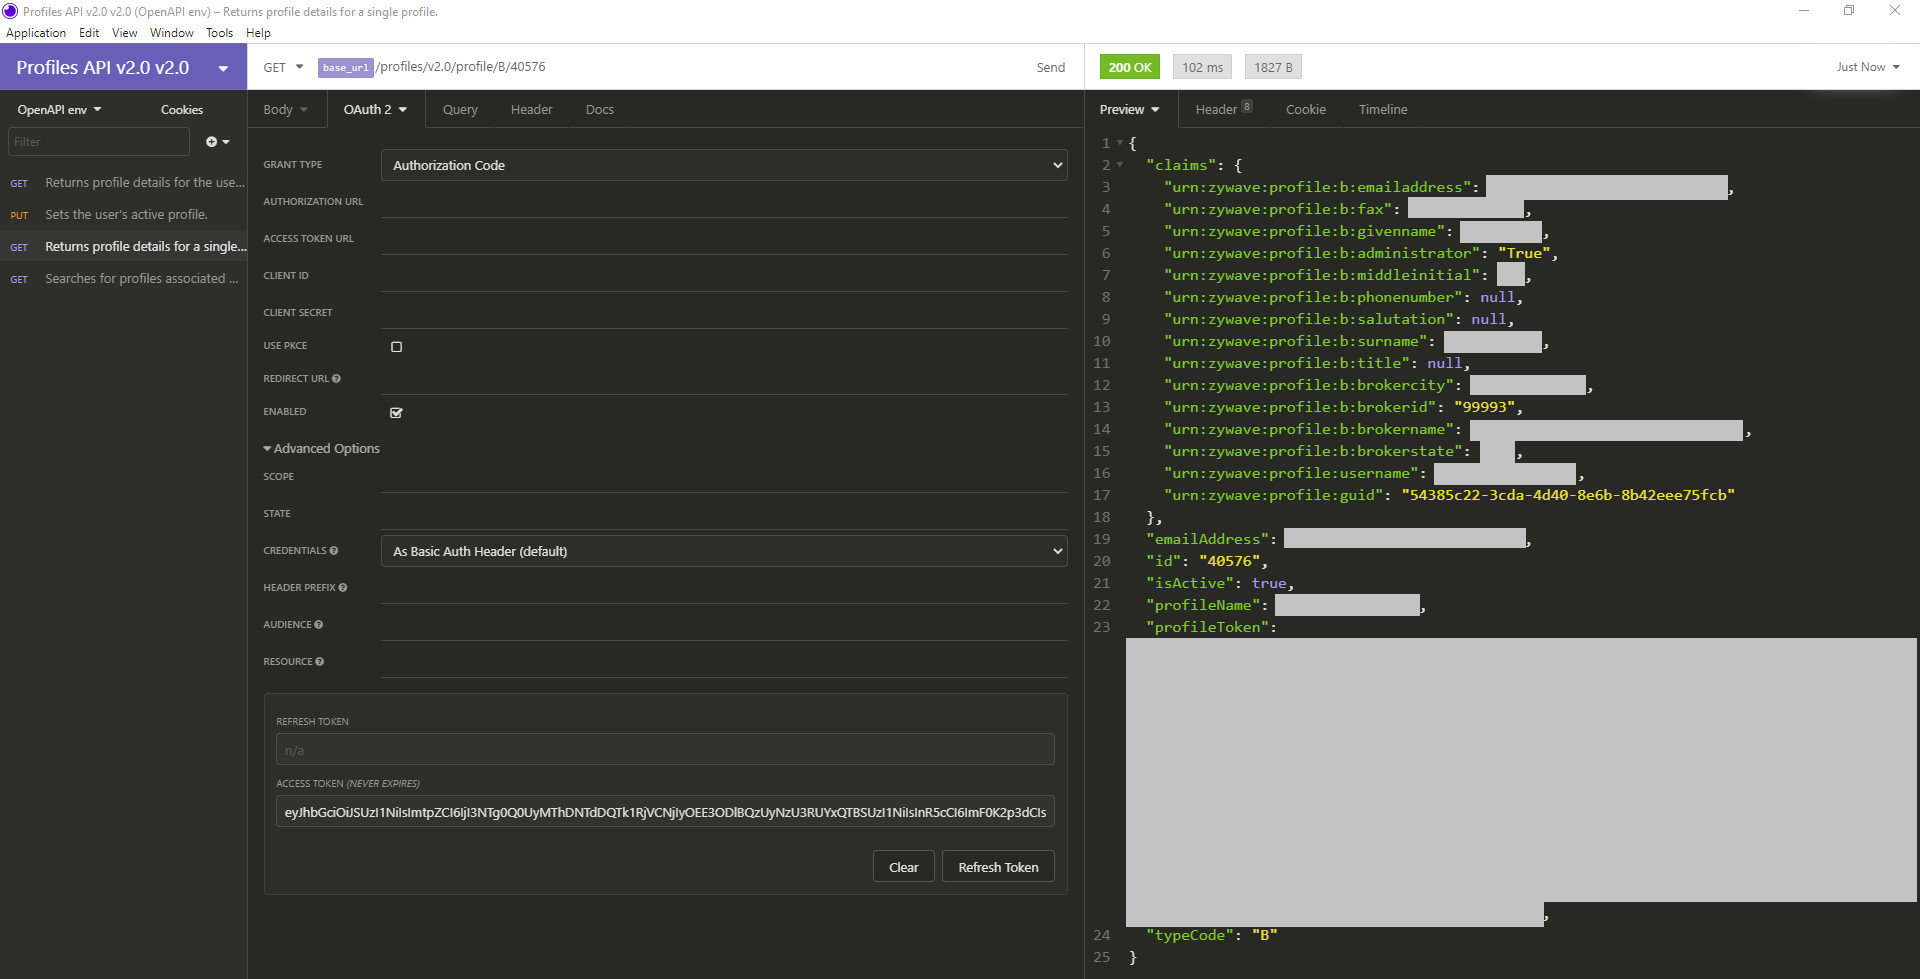
Now that you've configured authentication, you need to fill in any required request parameters. In this example, you just need to replace the red highlighted typeCode parameter with "B". After that, just click Send and you should see results that look like this. Note: Pieces of this example data have been censored for privacy.
Using Profile Tokens
As an example of how to use Profile tokens, we're going to make a simple call to the GET method of the Accounts API. As with the Profile API, you need to import the OpenAPI document into a new workspace and configure code flow OAuth to get an ACCESS TOKEN (or copy it from the Profile request). Note: If you choose to copy the token from the ACCESS TOKEN field, make sure to copy the entire token. Parts of the token may be obscured by the bounds of the text field.
The next step is to get a Profile token. To do so, switch back to the Profile workspace and choose a Profile from the results of the general GET call. Then, use its ID and type code ("B", in our example) to populate the id and typeCode parameters on the GET method for a specific Profile. Finally, either copy the ACCESS TOKEN from the general GET call or configure authentication on the specific GET call and click Send.
Once you click Send, you'll see something like this. Note: Pieces of this example data have been censored for privacy.
Copy the Profile token and switch back to the Accounts API workspace. Choose the general GET call, click the Headers tab, and add a header called Profile with a value of "Token <copied Profile token>". Now, all you have to do is click Send to receive results that look something like this.